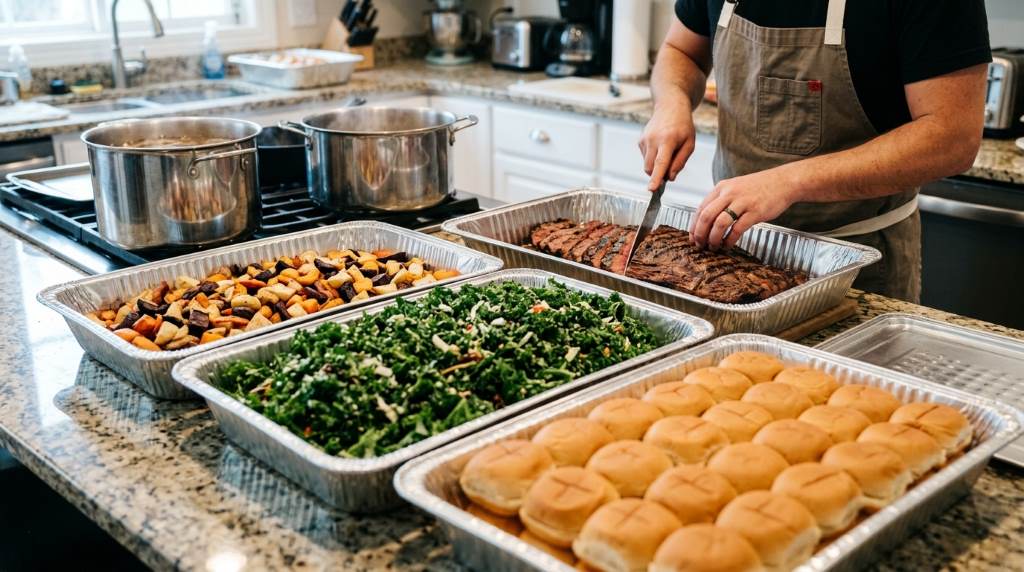
If you are planning food for 30 guests, prepare about 30 main servings, 60 side…
How to Serve Food and Drinks for the Perfect Party: A Host’s Guide to Stress-Free Entertaining
Picture this: Your guests are mingling, laughter fills the air, and the party food and drinks disappear almost as fast as you set them out. The energy is electric, the vibe is relaxed, and—most importantly—you’re actually enjoying yourself instead of stuck in the kitchen. Sounds like a dream? It’s not. The difference between a chaotic gathering and a seamless soirée comes down to one thing: how you serve the food and drinks.
After planning over 200 events—from intimate dinner parties to 100-person celebrations—I’ve learned that the key to hosting isn’t just about what you serve, but how you serve it. A 2025 survey by Eventbrite found that 78% of guests remember the flow of a party more than the menu. Did they struggle to find a drink? Were they awkwardly balancing a plate and a glass? These small details can make or break the experience.
This guide will walk you through the party hosting tips that professionals use to create a flawless event. You’ll learn how to design a serving setup that keeps guests happy, minimizes your stress, and ensures the party food and drinks shine. No fancy equipment or culinary degree required—just smart strategies that work every time.
1. Plan Your Serving Stations: The Blueprint for a Smooth Flow
The first rule of great hosting? Never let guests cluster in one spot. Instead, create zones that encourage movement and conversation. Here’s how to map it out:
- The Welcome Station:
Place a small table near the entrance with a signature drink, like a flavored sparkling water or a pre-batched cocktail. Add a stack of napkins and a handwritten note with the party’s hashtag or theme. This gives guests something to do immediately, easing any awkwardness. - The Main Food Spread:
Set up the bulk of your party food and drinks in a central location, but avoid the kitchen if possible. A dining table, buffet, or even a sturdy console table works. Arrange dishes in this order:- Plates and cutlery at the start
- Main dishes in the middle
- Sides and condiments at the end
Pro Tip: Use tiered stands or cake plates to elevate dishes. This creates visual interest and makes it easier for guests to see all the options.
- The Drink Hub:
Place drinks on a separate table from the food to prevent bottlenecks. Include:- A large beverage dispenser for a signature drink
- A cooler or ice bucket with bottled drinks
- A small trash bin nearby for empty cans or cups
- The Dessert Nook:
Set up a dessert table in a different area, like a sideboard or coffee table. This gives guests a reason to move around and keeps the main food area from getting crowded later in the evening.
Real Example: At a recent birthday party I hosted, separating the drink station from the food table cut the line by 50%. Guests could grab a drink first, then mingle while waiting for their turn at the buffet.
2. Master the Art of Food Presentation: Make It Look as Good as It Tastes
You don’t need to be a chef to create a stunning spread. These event food ideas focus on presentation tricks that wow guests without requiring gourmet skills:
- Use Color and Height:
Arrange dishes so colors contrast beautifully. For example, pair bright red tomato bruschetta with creamy white dips and green herb garnishes. Add height with stacked plates, wooden blocks, or upside-down bowls covered with a tablecloth. - Label Your Dishes:
Use small chalkboard signs or printed cards to name each dish. Include icons for dietary restrictions (e.g., a wheat symbol for gluten-free). This helps guests with allergies and sparks conversation. - Garnish Like a Pro:
Even store-bought dishes look homemade with the right garnish. Try:- Fresh herbs (parsley, cilantro, or basil)
- Citrus zest or wedges
- Edible flowers (like nasturtiums or pansies)
- A drizzle of balsamic glaze or hot honey
- Serve in Unexpected Vessels:
Use hollowed-out fruits (like watermelon or pineapple) as bowls for dips or salads. Mason jars make charming drink glasses, and wooden cutting boards double as rustic serving trays.
Pro Tip: For a cohesive look, stick to a color palette. For a summer party, think blues, whites, and yellows. For winter, deep reds, greens, and golds create a festive mood.
3. Nail the Drink Serving Guide: Keep Guests Hydrated and Happy
Nothing kills a party vibe faster than guests waiting in line for a drink. Avoid this with a well-organized drink serving guide that anticipates their needs:
- Pre-Batch Cocktails:
Mix large quantities of one or two signature drinks in advance. Store them in pitchers or drink dispensers with labels. For example:- A citrusy vodka spritz (vodka, elderflower liqueur, soda water, and grapefruit slices)
- A non-alcoholic sparkling punch (ginger beer, pineapple juice, and mint)
- Offer a Self-Serve Bar:
Set up a DIY station with:- A base spirit (like whiskey or gin)
- Mixers (tonic, soda, juice)
- Garnishes (lemons, limes, olives)
- Clear instructions for 1–2 simple cocktails
- Keep It Cold:
Use a large tub filled with ice to chill bottles of wine, beer, and soda. Add a layer of water to the ice to keep drinks colder longer. - Include a Water Station:
Place a dispenser with infused water (try cucumber-mint or berry-basil) alongside a stack of cups. Hydrated guests are happier—and less likely to overindulge in alcohol.
Real Example: At a summer BBQ, I set up a “build-your-own mimosa bar” with three juices (orange, grapefruit, and cranberry) and prosecco. Guests loved customizing their drinks, and it required zero effort from me.

4. Time Your Service: The Secret to Stress-Free Hosting
The biggest mistake hosts make? Trying to serve everything at once. Instead, stagger your party food and drinks to keep the energy flowing:
- Pre-Party Prep:
- Set out non-perishable items (chips, nuts, napkins) the night before.
- Pre-cut veggies, cheese, and fruit. Store them in airtight containers in the fridge.
- Make dips, dressings, and marinades ahead of time.
- During the Party:
- Start with light bites (cheese boards, crudités) as guests arrive.
- Serve the main dishes 45–60 minutes in.
- Bring out desserts 1–2 hours before the party ends. This gives guests a cue that the evening is winding down.
- The 30-Minute Rule:
Refresh platters every 30 minutes. Replace empty dishes with fresh ones, and consolidate half-empty plates to keep the spread looking abundant.
Pro Tip: Use a timer on your phone to remind you when to replenish drinks or serve the next course. This keeps you from getting distracted by conversations.
5. Choose the Right Serving Tools: Function Meets Style
The right tools make serving party food and drinks a breeze. Invest in these basics for a polished look:
- Platters and Trays:
- Wooden boards for cheese and charcuterie
- Ceramic platters for hot dishes
- Metal trays for a modern, industrial vibe
- Utensils:
- Tongs for salads and grilled items
- Small spoons for dips and spreads
- Cake knives for desserts
- Glassware:
- All-purpose glasses (like tumbler or mason jars) for drinks
- Wine glasses if serving wine
- Champagne flutes for toasts
- Extras:
- Cloth napkins (more eco-friendly and elegant than paper)
- Small bowls for nuts, olives, or condiments
- A roll of parchment paper for easy cleanup
Pro Tip: Rent specialty items (like chafing dishes or champagne towers) if you don’t want to buy them. Many party supply stores offer affordable rentals.
6. Accommodate Dietary Restrictions: Make Every Guest Feel Welcome
Nothing makes a guest feel more uncomfortable than not having food they can eat. Avoid this with these party hosting tips:
- Ask in Advance:
When sending invitations, include a line like, “Let us know about any dietary restrictions!” Common ones include gluten-free, vegan, nut allergies, and dairy-free. - Label Clearly:
Use small signs to mark dishes with allergens or dietary flags. For example:- “GF” for gluten-free
- “V” for vegan
- “Contains nuts”
- Offer a Build-Your-Own Option:
Taco bars, baked potato stations, or salad bowls let guests customize their plates to suit their needs. - Include a Safe Starch:
Always have a dish that’s free from common allergens, like roasted potatoes, a quinoa salad, or fresh fruit.
Real Example: At a holiday party, I served a vegan lentil shepherd’s pie alongside the traditional beef version. The vegan dish was a hit with all guests, not just those avoiding meat.
7. Keep the Party Moving: Entertainment That Complements the Food
Great party food and drinks deserve great vibes. Use these ideas to keep the energy high:
- Background Music:
Create a playlist in advance with a mix of upbeat and mellow songs. Aim for a volume that allows conversation but fills silences. - Interactive Food Stations:
- A DIY taco bar
- A make-your-own sundae station
- A charcuterie board with blank labels for guests to guess the cheeses
- Conversational Icebreakers:
Place a fun question at each table (e.g., “What’s your dream travel destination?”) or provide a Polaroid camera for guests to snap photos. - Timed Activities:
- A toast 30 minutes in
- A dessert reveal halfway through
- A group game (like trivia or charades) before dessert
Pro Tip: Assign a friend to help refill drinks or replenish food so you can focus on enjoying the party.
Related Topics:
FAQs: Your Party Hosting Questions Answered
1. How much food and drink should I plan per guest?
For a 2–3 hour party, plan for:
- 4–6 appetizer portions per person
- 1–2 drinks per guest in the first hour, then 1 per hour after
- 1–2 dessert items per person
2. What’s the easiest way to keep food warm?
Use chafing dishes, slow cookers, or warming trays. For buffets, cover dishes with foil until serving time.
3. How do I handle leftovers?
Send guests home with to-go containers (use eco-friendly options like compostable boxes). Label leftovers with the date and store them properly.
4. Can I use disposable plates and cups?
If you must, opt for compostable or recyclable options. Better yet, use real dishes and assign a friend to help with cleanup.
5. What’s the best way to serve alcohol responsibly?
Offer plenty of non-alcoholic options and food to slow absorption. Consider hiring a bartender or assigning a sober friend to monitor drinks.
6. How do I keep bugs away from outdoor food?
Use food covers, citronella candles, and fans (bugs avoid moving air). Keep sweet dishes indoors until serving time.
7. What’s the secret to a stress-free party?
Prep as much as possible in advance, delegate tasks, and remember: Guests care more about the vibe than perfection.
Conclusion: Host Like a Pro—Without the Stress
The perfect party isn’t about extravagant party food and drinks or Pinterest-worthy decor. It’s about creating an experience where guests feel welcome, well-fed, and eager to return. By focusing on smart serving strategies, you’ll spend less time in the kitchen and more time enjoying the celebration.
Start with one or two party hosting tips from this guide—maybe a signature drink station or a labeled cheese board—and build from there. Over time, you’ll develop a hosting style that feels effortless and uniquely you.
Your Turn: Which tip will you try at your next gathering? Share your party plans in the comments—and tag a friend who needs these event food ideas! Here’s to hosting with confidence and joy. Cheers!

Related Posts